Saturday, 31 January 2015

January Update

Another year begins and the run up to the Spring begins with some kit construction and a clearout of the workshop.

The build of the Engine Shed has continued

The completed shell was tried out on the railway to see how much room I had to site it.

No clearance...bugger... might need to revise the track layout.

Looks nice though.
The roof was added after a bit of fettling.

The hinges are glued in place on the doors

Next job is add the roof vent.

The sides and ends are glued on.
The doors go on.

Looking good.

The final roof sections are in place. Car filler is used to fill the gaps.

Ridge tiles are added

Unfortunately because of an error I made in building the smoke vent I had to add a bit more from some scrap plasticard.
The last job is to get it in the paint booth but I have to build that first.

I made a start on the Swift Sixteen kits.
The open wagon body parts

The end is glued and clamped in place.
1 body completed and ready for its wheels

The wheels are mounted on a steel axle which runs in a brass tube that is glued into the mounting turrets

On its wheels. The second kit quickly followed.
Before I started the coach kit I made a start on tidying the workshop. My work area is nice and tidy.

Still some work to be done on the rest!

The coach is a nice neat kit

The wheels fit in the same way as the trucks

The castings are good but need a bit of cleaning up

Once cleaned up and with the handle and grab rail in place the body looks great. Time for paint.
The Railcar was the last of my Christmas kits to build. Its a card kit that requires cutting out.

The sides are the first thing to be cut out

The Chief Engineer keeps an eye on progress as the windows are cut out.

Most important thing in the workshop
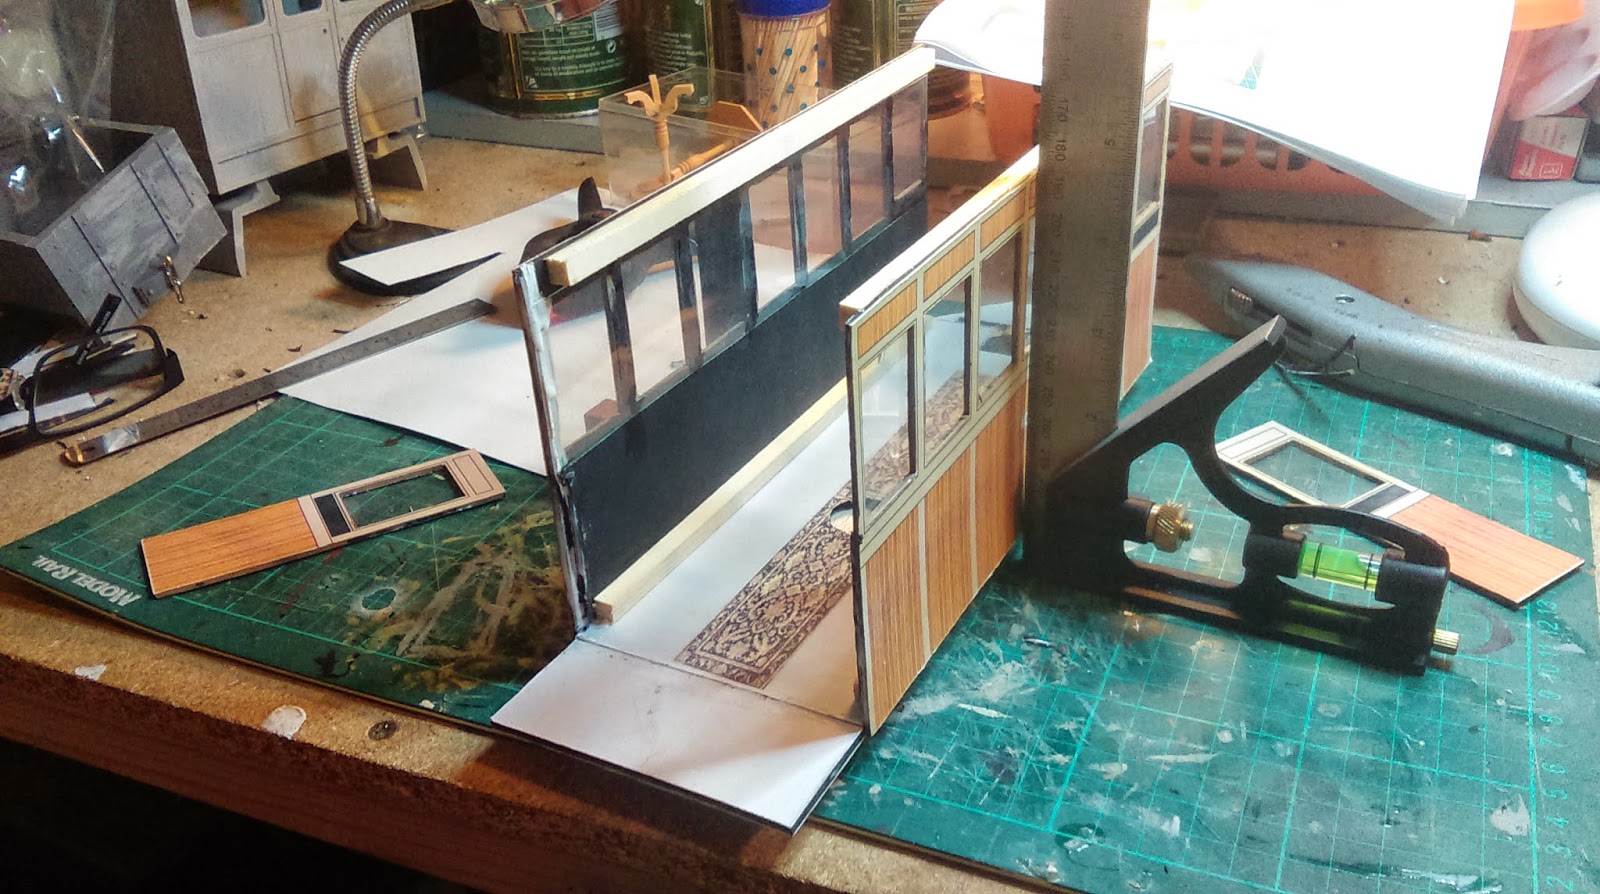
The windows all cut out, the other side followed after many blade changes as card really blunts blades quick.

Bracing wooden struts are glued in place

One side is ready, the other one will get its bracing next.

The rear panel is cut out along with its edge reinforcement strips

The floor components are cut out. They will be glued back to back to form a double thickness laminate

The cab sections are cut out

The body sides are glued in place

As is the front of the cab

The end panel is glued in place, just the cab to add.
The tidy up of the shed continued and I can finally get to the back of the shed
The winter bought us the first snow of the year although it was simply a light dusting I took the opportunity to get a picture or two.

No. 1 on snow clearing duty

The view from the workshop window.
Thats it for now except for one bit of late news is that I just won a second Swift Sixteen coach kit from E-Bay. It has had a coat of paint and has the brake coach duckets. More pictures in the February update.

Monday, 29 December 2014

Festive picture

My daughter just uploaded this picture featuring her Guinea Pig Stanley and the railways own Santa Sleigh.

Sunday, 28 December 2014

Christmas update

I hope everyone had a good Christmas and will have an enjoyable New Year celebration.

I have not been able to get at my computer over the Christmas period as the cupboard it is in has been blocked firstly with wrapped presents then with unwrapped ones!
A new laptop to replace the family pc has now been purchased and it should make doing updates easier.

I received a few presents that will be useful on or with the railway.

Whilst not a present this little 800 Watt heater was purchased over the Christmas period and will make the workshop a nicer place to work in.
I received 4 kits as gifts the first being this neat 4-wheel coach from Swift Sixteen 

My daughters bought me one each of these open wagons also from Swift Sixteen
  
Finally I got this complete railcar kit by Rail-Road Models from my Mother-in-Law
So lots of things to do before the Spring comes again.

Saturday, 6 December 2014

December update - Christmas is coming!

No work has occurred on the railway mainly because it has been wet and the garden gets rather boggy. First job in the spring is to complete the footpaths to make it more usable in such weather.

The engine shed is slowly coming together (very slowly) I will put more pictures up of progress when I take some.

Locomotive no. 2 has had some work done on it. The problem with the gears coming out of mesh was excessive side to side movement of the driving axle. A couple of bits of plasticard behind the wheels cured that, still leaving some movement but preventing the gears from becoming un meshed.

You can see how much movement there was in the axle (the top one) in this picture.

Once modified it made light work of the heaviest piece of rolling stock on the line.
It now runs very well but could do with some more weight and perhaps 4 wheel drive.

I recently ordered a new displacement lubricator from Dream Steam and, after a short delay due to the quality of the painting on some of the stock supplied to the company by a third party, it duly arrived. The next task was to rebuild the loco from its kit of parts.

The loco in bits. Its not actually that hard to rebuild.

And there she is. The gas tank will be turned round so the control knob comes out of the side window and not the front.
Another parcel also came from Houstoun Gate Locomotive Works with a very festive little kit.

Actually two kits, a flat truck and its Santa Sleigh load.

As the locoshed is taking up all workspace construction was done on the kitchen table with the houshold authorities permission of course
The sleigh is a simple thing to put together with tabs going into slots.

A bit of weight ensures the skids go on correctly
Whilst the sleigh was drying the flat truck was constructed. The kit contains everything appart from glue and paint and can be ordered with 32mm or 45mm gauge wheelsets.

Construction is very simple, I would suggest this as a good kit to get children into modelling as it uses a harmless wood glue and simply needs sanding to prepare.
The complete kits posed together for the first time. A coat of sanding sealer or two followed.
A coart of red begins to bring the model to life. A vistor from Santa inspects the work to date. He looks pleased with it.
With the white trimming added and the flat truck painted as well it is all finished well in time for the festive season.
He does look pleased.
Thats it for the moment. If I dont get a chance to add a Christmas Day update may I wish you all a Very Merry Christmas and a Garden Railway filled New Year.

Monday, 10 November 2014

Start made on Engine Shed

At the 16mm AGM in May I purchased several buildings, most of which are nearing completion but the engine shed has had to wait for a while. Why would that be I hear you cry, well, its all to do with its physical size, it fills my workspace completely.
Now that most of the other projects are complete or nearly complete I have a bit of space to get this build in motion.
The kit comes in two large bags and is mostly made of resin.

The detail is wonderful and should make a nice structure for the station area.

The mouldings are surprisingly free of flash and only require minimum cleaning up.

The edges are cleaned up and the surfaces roughened up ready for adhesive.

The rear wall and left side are glued together.
More as I progress.