Tuesday 28 May 2013

Station Building progress

The new station building is now getting its paint job as the pictures show and the work has finally started on the foundations for the main station area.


The station gets a spray of primer

The woodwork gets a coat of green. This will be applied
to the windows and internal door as well.

Dark grey is applied to the walls

White goes on the internal walls and the window sills and
lintels
In the garden the foundation trench for the station
has been started.
The old OO railway trackbed is also being removed with
the earth from the foundation trench being used to
infill the trench left.

Wednesday 22 May 2013

Station building

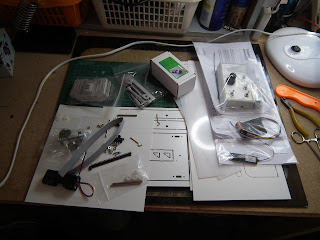
At the recent Peterborough show I purchased a small station building kit from AnDel Models. Today I started the process of building it by sanding off all the edges and opening up the windows by removing the infill. Thats as far as I got because I cannot find my square which I need to begin building. Will be having a look on the Squires website to order a new one.

The new loco has also had some work done with the inside of the cab painted matt black and the roof getting another coat of light grey.

All the bits are there

first the sides are fixed to the ends

Then fixed together and the dividing wall added.

Tuesday 14 May 2013

Finally complete (almost)

The loco is now complete in that all the bits are together, the power and remote systems are installed and it all works. It still needs the inside of the cab to be painted, a driver to be fitted and some weathering and details to be added but I can use it from now on as part of the operational fleet. Just need to get the railway construction started now.

New doors and engine hatches in place

All sprayed up and with the exhaust and horn fitted
The completed loco was given a test run and it works well.


Friday 10 May 2013

Riveting!

Did a few more jobs on the loco today including putting on some very small rivet heads. The pictures below tell the story.
The paint job is complete for the moment. 

The chassis has been run in on the bench using a couple of AA nicads
The remote unit has also been tested with the same sort of lash-up

The engine cover doors were supposed to have simply been scribed into the plastic.
I think the flat plastic looks very bare so I am adding these doors to add a bit of interest.
The pencil shows the size of the rivets.

Lots of rivets on the nose. I noticed the right hand one was out of line.
Luckly the glue was still wet and now it has been pushed back in line.
I am currently cutting out door overlays to fix to the side of the cabs as I really don't like the simple scribed ones that the instructions tell you to create.
Still to add are the horn, hand rails and exhaust stack plus the loco brake stand inside the cab.
Then its just a case of finishing any painting, adding lining to the body, fit the remote control and the rest of the wiring and finally glaze the windows.
The loco will be numbered 2 and named AMANDA after my eldest daughter.

Thursday 9 May 2013

Latest progress on Loco

A few more pics of my progress on building No. 2. (rest will be added later today) I have had to contact IP Engineering because the kit contained a hand brake stand and not an exhaust pipe, hopefully they will send me the exhaust pipe soon.

Sorry no extra pics today, it is chucking it down out there and i would have to go through it to get to my workshop. Will take them tomorrow

The chassis completed and running.

Monday 6 May 2013

Lots of work done

The loco is rapidly taking shape now as the following pictures show

The frame is now complete with its ballast weight buffer beams

The cab is also complete with the addition of its roof

The bonnet is also ready 

The cab and bonnet are mated and it is now beginning to look like a loco

The fake axle boxes are fitted

The frame gets a coat of primer

The loco is put together temporarily to check the fit. All is well.

The frame gets its first coat of black

Whilst the body gets a nice light blue livery, mainly because I have a can of it.
I hope to get the detailing started tomorrow but I am not sure if I will be able to get it wired up as I haven't sorted out the batteries yet.

Saturday 4 May 2013

More Loco Construction

I have now completed the main bodywork construction although I havn't photographed all of it yet so the pictures below don't tell the whole story yet.

The cab ready to have its roof fitted

The engine cover under construction

The couplings and buffer beams are two large casting to add much needed weight to the model

First job is to drill the hole for the coupling hook

The hook fits nicely, now just need to glue the buffer beams to the frame

The cab sub roof is fitted

The chassis is primed ready for a coat of black paint.
I may not have time to do any more work tomorrow as we are off to Brands Hatch for the day as guests of a motor racing team but I do hope to get the cab and the engine cover glued together and fitted to the frame and chassis.

Friday 3 May 2013

Build of Loco started

It has been lovely weather today and I have used my time to cut the grass, get some running shoes to start trying to lose weight and get fitter but most importantly of all I have started to build my IP Engineering Feanor loco kit.
Hopefully this pile of bits will eventually be a fully functioning locomotive

The main chassis is formed of 3 pieces of plasticard.
The components of the frame of the loco

And here they all are glued together

The ballast weight holders are now attached

With the frame drying I started on the cab,
I hope to get a lot more done tomorrow once my chores are complete. Who knows, I may even have the body complete by Sunday.


New model railway shop near Harlow

I have just visited a small, new model railway shop located in the picturesque village of Hatfield Heath on Pond Lane. He stocks most things for OO and N gauge but is happy to order for other scales as well. If you are in the area why not give him a visit.