Wednesday, 11 October 2017

Big Update Part 8 - Harecroft Threlkeld Quarry Runner Wagon

This is an unusual kit or at least the version I decided to build is. The kit is wonderfully designed and easy to build and because real wood is used its easy to distress and weather.
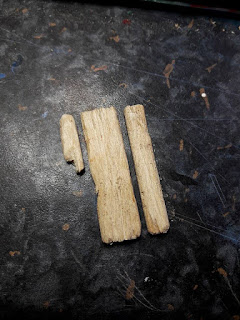
The top planks ready for distressing 
The three planks after being attacked by wire brush and craft knife.
Time for the chassis to get attacked. The top is pre attack and the bottom is post, The small blob on the bottom part is my blood!
With the chassis frame glued up the planks were placed on it to get an idea of the final look.
Couplings and axle boxes in place
The axle boxes and couplings have been painted whilst the frame has had a coat of indian ink very diluted.
The wheels have been added and the frame looks really good.
The planks have been added and the wagon is complete
Posed on the railway it looks really good.
This wagon will probably spend most of its time parked on a siding somewhere along with a couple of other decrepit pieces of stock although it does run but is quite light due to the lack of hiding places for lead weight. Matt, the designer of the kit, thinks this is the only customer version built to depict the wagon as it currently is as most others are built as working wagons.

Tuesday, 10 October 2017

Big Update Part 7 - Phil Sharples Little Steam Loco + Tender

Another kit from the Phil Sharples stable but this time its a locomotive. Its a small 0-4-0 steam outline powered by a couple of AAA batteries via an on/off switch so no speed control or direction control. It will be fitted with remote control in the future.
What the loco should look like I hope
The kit of parts in all its glory
The wheels are the first job complete with coupling rods.
Wheelsets ready for use
The chassis under construction
The body under construction
The boiler top detail added
The body with details added
Cab detail going in
Electrics in place
Almost complete and getting a test run
Last bits of detail going in. I also added rivet and bolt detail on the buffer beams.
Painting in progress
A little while later I bought a tender kit which is build in the same way as most of the wagons.
The loco completed
And the tender
I was going to get some nice pictures of the loco at Brambleton but one of the wheels slipped on the axle putting out the quartering and derailing the loco. It caused no damage but I didnt get the pictures. Once I sort out the wheel I will get those pictures.

Sunday, 8 October 2017

A Big Update Part 6 - Phil Sharples Fuel Bowser Wagon

This little wagon will join the PW train and brings a bit of interest to the setup.
The parts for the wagon using the Binnie Skip Chassis.
With all the parts painted and glued together only the hose needs to be fitted and finished.
With the hose, pump handle and hose hook in place it just needs touching up to complete.
Completed and on the line. Just needs numbering.
Another nice wagon joining the ever growing fleet of Phil Sharples wagons on the railway.

Wednesday, 4 October 2017

A Big Update Part 5 - 3 wagons at a time

I had three Phil Sharples kits to build and as they are nice and simple I decided to do them all at once.

One is an open wagon with removable ends that will form part of the PW train, the other 2 are oil barrel carrier wagons.

The three kits as supplied.
The open wagon kit in all its glory
One of the barrel wagons ready for assembly to begin.
The three main chassis assemblies glued up and drying.
All three with wheels fitted, time for the bodywork.
The open wagon with its bodywork in place. The ends are loose as they will be made removable.
The oil drum support frames being constructed.
The open wagons ends in place with their runners glued on.
Just to prove I didnt glue them in place :-)
The open wagon ready for weathering.
The barrels wagons are also ready for the barrels to be glued on and then weathering added.
The barrel wagons completed and on the railway.
The open wagon is also complete. 
All the wagons had lead added and some weathering pt on and our now in service.

A Big Update Part 4 - Flat Wagon

This wagon from Phil Sharples varies from the others slightly as it uses a Binnie Skip Chassis instead of Phil's own design.
The parts ready for construction to begin.
Apart from the task of cutting the axles to length (which is quite easy) the chassis falls together.
The top is just three parts, two that fit in the top of the chassis and then the top with its panel detail.
Whilst the chassis got a couple of coats of matt black the top was treated to a very diluted coat of black indian ink . The scrape marks appeared after the ink was applied.
Metal hooks were added and the wagon was ready for service. Now it just needs a load of some sort.

A Big Update Part 3 - Runner Wagon

This small wagon will form part of the PW train which will eventually be hauled by the new LAT loco which will form a future posting.

It is yet another Phil Sharples kit and goes together wonderfully.
The kit is nicely packed.
The kit of parts ready for assembly to begin.
With the main body assembled the bearings go in ready for the wheelsets to go in.
With the wheels and top rails added the wagon is almost complete.

The side panels finish it off nicely,
This wonderful little kit got to this stage in a couple of hours and would have been quicker had I used a fast drying glue.
With its paint and coupling hooks on the wagon is complete and usable however I want to add a load and some weathering.
The side plates are a bit flat so I added some plastic rivet heads for some relief.
A nice parcel from SLR models included some useful tools. More of the other bits in a future post.
The tools placed on the wagon look good and just need painting and a bit of rust
With the tools painted and aged they have been fixed down to the wagon. I Decided to use the shovel instead of the rail bender.
So that another wagon on the rails (I also added some lead weight to make it run better).