As usual the pictures tell the tale
Getting the lights on
 |
| The station building looks good in its new setting |
 |
| It looks very good once the lights come on |
 |
| To control the 12 volt lights I am using this little circuit which was built from a kit purchased from Maplins |
 |
| A sensor detects the level of light falling on it and when it reaches a point set by the potentiometer to the left of the LED the output relay is triggered. |
A short operating session
 |
| Nice weather saw the line getting an opperating session mainly using 'Timo' on a mixed train. |
 |
| Here she passes the Mamod in the station |
 |
| The garden is slowly getting greener |
 |
| After her days work she has a rest in the engine shed. |
Lots of goodies |
| Its not Christmas but I do like to get a parcel. This one is from Houston Gate Locomotive works. |
 |
| Lots of goodies |
 |
| A couple of van kits |
 |
| A Father Christmas for the model sleigh |
 |
| A closed cab locomotive and chassis kit |
 |
| And finally a roof jig to help me with the vans. |
Roof Jig
 |
| The parts of the kit are separated and a dry run of the assembly is carried out |
 |
| Now the parts get glued together |
 |
| And its complete |
 |
| A quick coat of paint to make it look nice |
 |
| All finished and ready for use. |
Signal Box Base
 |
| The base is a simple flat piece of wood with strengthening struts underneath it. |
 |
| The signal lever base was fabricated from a section of plastic pipe with slots cut in it. |
 |
| The lever base was located on the floor to make sure the scale looked right |
 |
| I had purchased an interior kit but it is a bit too big for the signal cabin so it will be used else where. |
 |
| The base is now painted black and stuck down to the floor and the floor boards added around it. |
 |
| The base is tried out inside the cabin. |
Broken Track
 |
| I had a short (very short as it turned out) operating session and the train kept derailing at this point. |
 |
| Looking at the track I noticed that the top fish plate had broken due to the 30 degree plus temperatures we had. This will need to be repaired before running can re-start. |
Fendyke Wagons
 |
| I couldnt find the original supplied wood for the roof so I have started to make a new one from balsa wood. |
 |
| Next Fendyke van to pass through the works will be this brake van. |
Workshop Rebuild
The workshop has had a complete clear out and rebuild using old kitchen worktop and kitchen cupboard supplied by a work mate who is rebuilding his kitchen.
 |
| The workshop has got more and more cluttered with non railway items being stored at the back reducing the amount of room for working. |
 |
| My working end is quite small and lacking in storage. |
 |
| The contents of the workshop was removed and stored on the patio under our shelter. |
 |
| The workshop looking a lot clearer |
 |
| Now just the crap at the back to be removed. |
 |
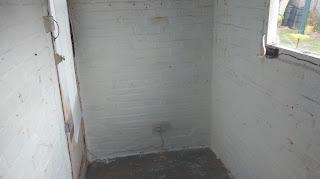
| Thats it, all cleared |
 |
| Lots of lovely room. |
 |
| The contents all safely covered up. |
 |
| First the kitchen unit was fitted. This will house all the stock. |
 |
| The worktops in place. |
 |
| The ceiling being boarded. the gap will house a lighting board. |
 |
| A piece of the old worktop is put in place at the end, the PC will go here eventually. |
 |
| Storage in place at the work bench area |
 |
| Shelving put up and the spray booth is in place |
 |
| At last, a clear workbench |
Thats it, a bit late (the July update will be out in just over a fortnight!), and with a new workshop that just needs mains wiring completed I have a lot of projects to get started as well as getting old projects and jobs done. A busy summer is ahead.
No comments:
Post a Comment