
Monday 29 December 2014
Festive picture
My daughter just uploaded this picture featuring her Guinea Pig Stanley and the railways own Santa Sleigh.
Sunday 28 December 2014
Christmas update
I have not been able to get at my computer over the Christmas period as the cupboard it is in has been blocked firstly with wrapped presents then with unwrapped ones!
A new laptop to replace the family pc has now been purchased and it should make doing updates easier.
I received a few presents that will be useful on or with the railway.
 |
| Whilst not a present this little 800 Watt heater was purchased over the Christmas period and will make the workshop a nicer place to work in. |
 |
| I received 4 kits as gifts the first being this neat 4-wheel coach from Swift Sixteen |
 |
| My daughters bought me one each of these open wagons also from Swift Sixteen |
 |
| Finally I got this complete railcar kit by Rail-Road Models from my Mother-in-Law |
So lots of things to do before the Spring comes again.
Saturday 6 December 2014
December update - Christmas is coming!
No work has occurred on the railway mainly because it has been wet and the garden gets rather boggy. First job in the spring is to complete the footpaths to make it more usable in such weather.
The engine shed is slowly coming together (very slowly) I will put more pictures up of progress when I take some.
Locomotive no. 2 has had some work done on it. The problem with the gears coming out of mesh was excessive side to side movement of the driving axle. A couple of bits of plasticard behind the wheels cured that, still leaving some movement but preventing the gears from becoming un meshed.
It now runs very well but could do with some more weight and perhaps 4 wheel drive.
I recently ordered a new displacement lubricator from Dream Steam and, after a short delay due to the quality of the painting on some of the stock supplied to the company by a third party, it duly arrived. The next task was to rebuild the loco from its kit of parts.
Another parcel also came from Houstoun Gate Locomotive Works with a very festive little kit.
Thats it for the moment. If I dont get a chance to add a Christmas Day update may I wish you all a Very Merry Christmas and a Garden Railway filled New Year.
The engine shed is slowly coming together (very slowly) I will put more pictures up of progress when I take some.
Locomotive no. 2 has had some work done on it. The problem with the gears coming out of mesh was excessive side to side movement of the driving axle. A couple of bits of plasticard behind the wheels cured that, still leaving some movement but preventing the gears from becoming un meshed.
 |
| You can see how much movement there was in the axle (the top one) in this picture. |
 |
| Once modified it made light work of the heaviest piece of rolling stock on the line. |
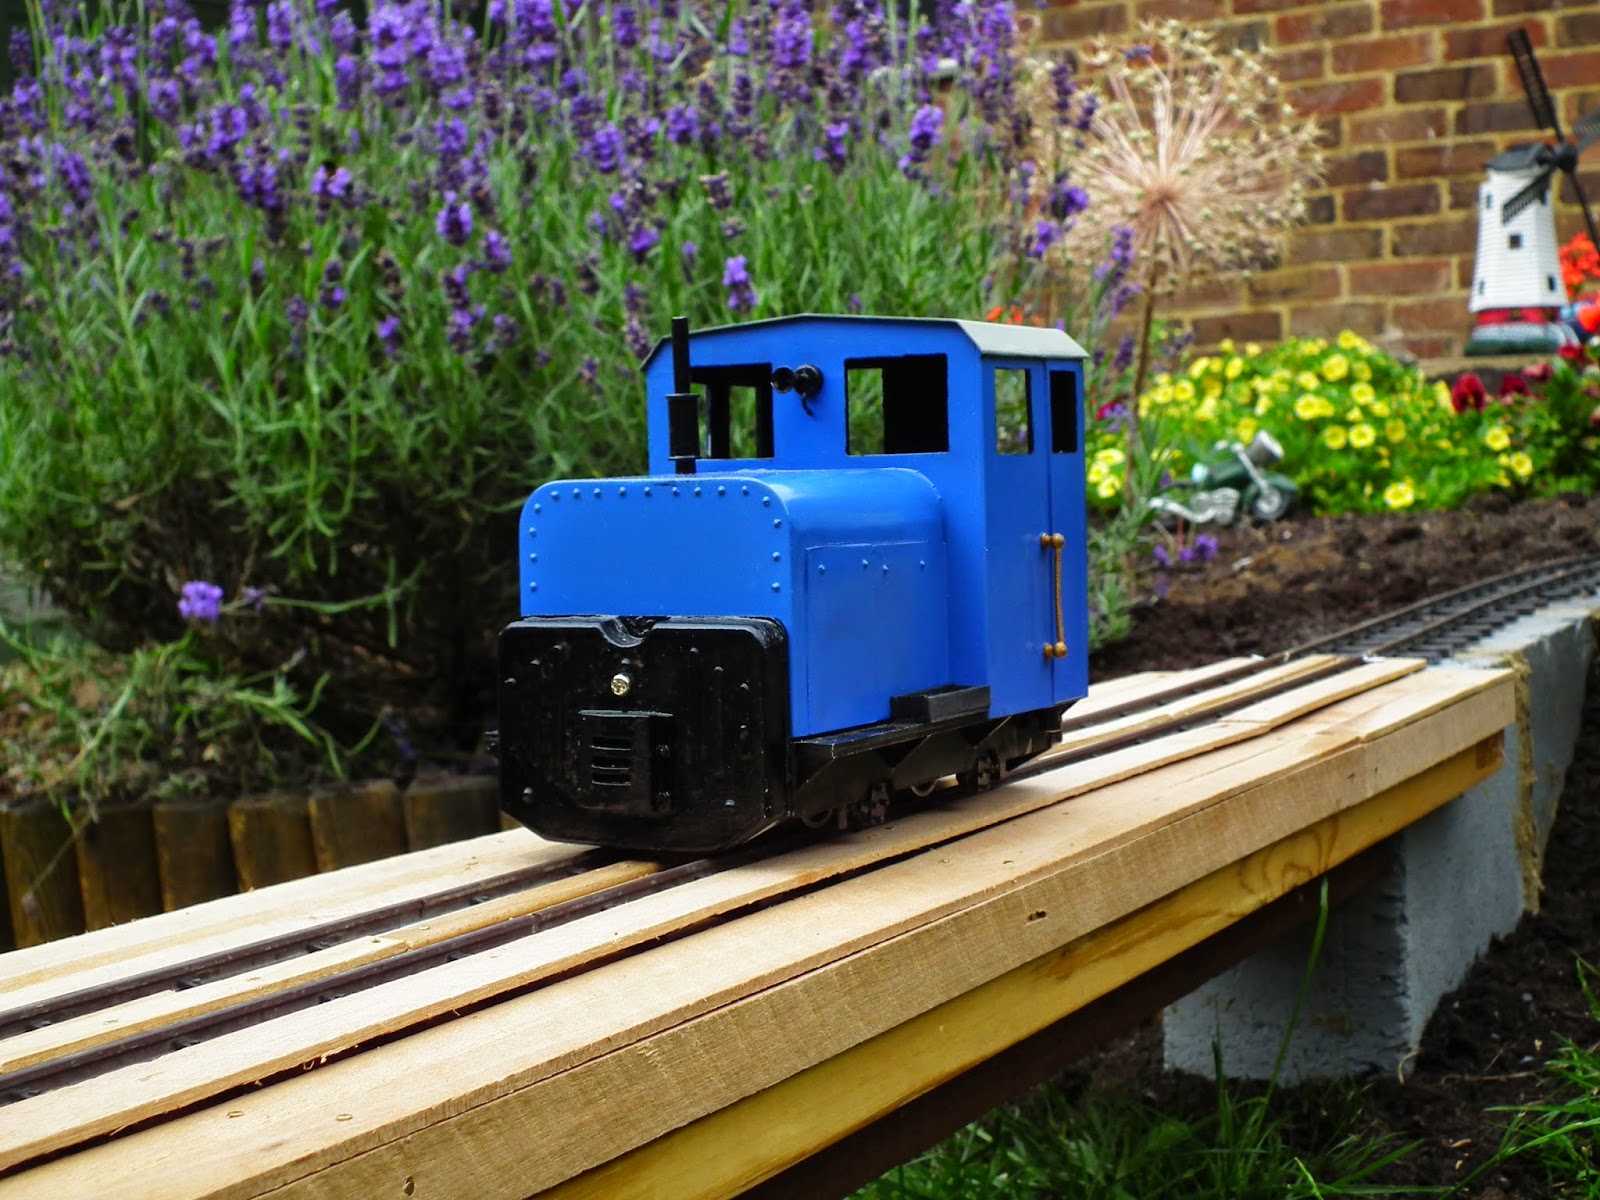
I recently ordered a new displacement lubricator from Dream Steam and, after a short delay due to the quality of the painting on some of the stock supplied to the company by a third party, it duly arrived. The next task was to rebuild the loco from its kit of parts.
 |
| The loco in bits. Its not actually that hard to rebuild. |
 |
| And there she is. The gas tank will be turned round so the control knob comes out of the side window and not the front. |
 |
| Actually two kits, a flat truck and its Santa Sleigh load. |
 |
| As the locoshed is taking up all workspace construction was done on the kitchen table with the houshold authorities permission of course |
 |
| The sleigh is a simple thing to put together with tabs going into slots. |
 |
| A bit of weight ensures the skids go on correctly |
 |
| Whilst the sleigh was drying the flat truck was constructed. The kit contains everything appart from glue and paint and can be ordered with 32mm or 45mm gauge wheelsets. |
 |
| Construction is very simple, I would suggest this as a good kit to get children into modelling as it uses a harmless wood glue and simply needs sanding to prepare. |
 |
| The complete kits posed together for the first time. A coat of sanding sealer or two followed. |
 |
| A coart of red begins to bring the model to life. A vistor from Santa inspects the work to date. He looks pleased with it. |
 |
| With the white trimming added and the flat truck painted as well it is all finished well in time for the festive season. |
 |
| He does look pleased. |
Monday 10 November 2014
Start made on Engine Shed
At the 16mm AGM in May I purchased several buildings, most of which are nearing completion but the engine shed has had to wait for a while. Why would that be I hear you cry, well, its all to do with its physical size, it fills my workspace completely.
Now that most of the other projects are complete or nearly complete I have a bit of space to get this build in motion.
More as I progress.
Now that most of the other projects are complete or nearly complete I have a bit of space to get this build in motion.
 |
| The kit comes in two large bags and is mostly made of resin. |
 |
| The detail is wonderful and should make a nice structure for the station area. |
 |
| The mouldings are surprisingly free of flash and only require minimum cleaning up. |
 |
| The edges are cleaned up and the surfaces roughened up ready for adhesive. |
 |
| The rear wall and left side are glued together. |
Tuesday 28 October 2014
Sunday 26 October 2014
Monthly update - October 2014
I have decided to try and do a monthly update as the ad hoc ones are getting further and further apart.
The main loop is complete and several runs have been made over it although lack of time and the weather have curtailed any real running.
I did manage to do a cab ride video, this is in the video section and will be replaced as further developments take place.
The workshop has been cleared so I can now reach everything again. I still need to put an insulated ceiling in. I have a few spare rest days coming up when I will be able to make a start on this.
And now a few pictures:
The first run was going to be done by no. 2 but a problem with the drive becoming un meshed has occurred and a fix for this problem will be carried out.
The cab ride can be viewed here. Its a bit noisy and I didnt get the camera very level but it gives you an idea.
The main loop is complete and several runs have been made over it although lack of time and the weather have curtailed any real running.
I did manage to do a cab ride video, this is in the video section and will be replaced as further developments take place.
The workshop has been cleared so I can now reach everything again. I still need to put an insulated ceiling in. I have a few spare rest days coming up when I will be able to make a start on this.
And now a few pictures:
 |
| A little visitor to the line |
 |
| He didnt like the drill |
 |
| The last panels of track are added |
 |
| The Chief Engineer see off a test run by no. 1 |
 |
| Leaving the station over the footpath crossing |
 |
| Negotiating the point work to at the Mine Tramway Junction |
 |
| Across the removable footpath bridge |
 |
| Over the raised section |
 |
| Heading back to the station |
 |
| Across the trestle bridge |
 |
| And back to the start again |
 |
| The only other run that occurred was using No. 1 as a camera vehicle |
Tuesday 30 September 2014
Main circuit completed at last
The main circuit of the line is now in place and has had a brief test run, work and family matters have got in the way of a proper opperating session but that will happen soon.
More pictures will be added when I get time for a proper run.
 |
| No. 2 on a short test train. |
Tuesday 16 September 2014
Track panels delivered
The final bits of track required to complete the main circuit have been delivered just in time for my long weekend. Hopefully I will get the track laid on Friday and get some trains running over the weekend.
A cab ride video of the line will follow next week.
A cab ride video of the line will follow next week.
 |
| Nice shiny new track and fishplates. |
Friday 5 September 2014
Trackbed Completed
Over the last few days the trackbed has been completed and a coat of preservative has been put on it to protect it. Now there is just the top layer of preservative to be put on and then the track to lay and the loop of the railway will be complete.
 |
| Work in progress and the beam is leveled and the legs are driven into the ground. No concrete as I dont want to damage the roots of the shrubs. |
 |
| The beam from the trestle bridge in place and leveled |
 |
| The other beam is getting its wooden trackbed fitted |
 |
| A small gap |
 |
| A visitor overhead. We live near to North Weald airfield and it is not unusual to be buzzed by spitfires and gnats. |
 |
| All in place and waiting for a coat of preservative. |
Tuesday 26 August 2014
Lets talk weather
No progress has been made on the railway mostly due to the weather but also due to other commitments like going to the BTCC at Snetterton and having a meal on the train at the Great Central railway with my daughter as part of my birthday present.
I will be doing a proper update soon and adding pictures from my holiday as well as from the great central soon.
I will be doing a proper update soon and adding pictures from my holiday as well as from the great central soon.
Tuesday 5 August 2014
Another gap bridged.
The new removable bridge has had plank work added to it and received a good coat of preservative. It will eventually get handrails as well.
 |
| The new bridge in place complete with trackwork. |
 |
| No. 2 gets the job of testing the bridge, she approaches with caution |
 |
| On the bridge and everything is fine with the low slung buffer beams easily clearing the planking. |
 |
| She ran right across to the current limit of the line. |
 |
| The rails are held in alignment using an old OO gauge trick with stiff wire, in this case the shanks of pop rivets, in copper tube soldered to the rails. |
Tuesday 8 July 2014
Nameplates and bridges
A few things have been done to the line. The abutments for the trestle have been finished and the bridge put back in position (pictures will follow) and I have started on the next, removable, bridge. In the workshop I have had a go at making nameplates for the locos.
 |
| The trackbed through the flower bed is now complete, time for a bridge. |
 |
| And this will be that bridge. I have put strengthening struts underneath it (forgot to photograph them) and given it a couple of coats of creosote. Detail will follow. |
 |
| First go at making a nameplate using 5mm letters and scrap plastic. Backing needs to be thinner next time. |
 |
| Once painted and fixed to the loco they look good |
Subscribe to:
Posts (Atom)